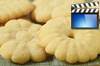
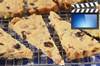
26 Years of Award Winning Baking & Dessert Video Recipes

breakfast & brunch bars & squares cupcakes shortbreads breads youtube channel
about us
recipe index
substitutions
ingredients
glossary
conversions
weight vs volume
easter baking
apple recipes
pumpkin recipes
cranberry recipes
chocolate recipes
healthy baking
eggless recipes
comfort foods
blueberry recipes
biscotti recipes
pudding recipes
english tea party
trifle recipes
ice cream recipes
strawberry recipes
lemon recipes
thanksgiving baking
candy recipes
halloween baking
valentine's baking
christmas cookies
christmas baking
christmas candy
baking history
bibliography

 
Subscribe Now
 

Thumbprint Cookies Recipe & Video

Printer Friendly Page

Pin It

Thumbprint Cookies are a very popular holiday cookie. They are made with an enriched shortbread dough that is formed into balls and then rolled in finely chopped nuts or dried coconut. The name 'thumbprint' comes from the fact that you use your "thumb" to make an indentation into each ball of dough. The indentation is then filled with your favorite jam.


Once the Thumbprint Cookie batter is made, if it is too soft to roll into balls, cover and refrigerate until firm. This can take anywhere from 30 to 60 minutes. Then form the dough into round balls. Next, each ball of cookie dough is rolled first in a beaten egg white and then in finely chopped nuts. The egg white acts like a glue so that the nuts will adhere to the cookie batter. You can use a variety of nuts; walnuts (my favorite), or pecans, hazelnuts, or almonds. I also like to first toast the nuts as it brings out their flavor. The last step is to make an indentation, using your thumb or the end of a wooden spoon, into the center of each cookie. Fill the indentation with about 1/2 teaspoon of your favorite jam. Now, some recipes do call for filling the centers of the cookies with jam after they are baked. This is best if you want to store the cookies for more than a few days because the jam does soften the cookies over time.

Although I have filled the cookies with raspberry jam, feel free to use any flavor of jam. I do like to use a sweet yet tart flavored jam (like raspberry), as it offsets the richness of the cookie. If you decide to use preserves, just make sure to strain the preserves first to remove any large pieces of fruit. (Note: Jam and preserves are similar in that they are both a cooked combination of fruit and sugar (and sometimes pectin). The difference being that preserves still contain chunks of fruit, whereas jam is more like a smooth fruit puree.)

Related Recipes You May Like

Snowman Macarons Recipe

Spritz Cookies

Rum Balls

Raspberry Butter Cookies

Shortbread Cookies

Shortbread Buttons

Thumbprint Cookies: Preheat your oven to 350 degrees F (180 degrees C) and place the oven rack in the center of the oven. Line a baking sheet with parchment paper.

In the bowl of your electric stand mixer, fitted with the paddle attachment (or with a hand mixer), beat the butter until smooth. Add the sugar and beat until incorporated. Add the egg yolk and vanilla extract and beat until combined. Scrape down the sides and bottom of your bowl as needed.

In a separate bowl, whisk together the flour and salt. Add the flour mixture to the batter and beat just until combined. If the batter is too soft to roll into balls, refrigerate for about 30 to 60 minutes.
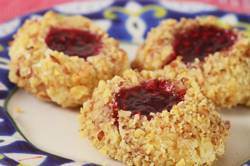
In a small bowl, whisk the egg white until frothy. Place the finely chopped nuts on a plate. Roll the batter into 1 inch (2.5 cm) balls (15 grams for each cookie). Then, taking one ball of dough at a time, first roll it in the egg white and then roll in the nuts. Place on the prepared baking sheet spacing about 2 inches (5 cm) apart. Using your thumb or end of a wooden spoon, make an indentation into the center of each cookie and then fill (spoon or pipe) the indentation with about 1/2 teaspoon of your favorite jam.

Bake for about 12 minutes, or until cookies are just set and the nuts have nicely browned. Remove from oven and place on wire rack to cool. 

Note: To toast the nuts. Spread nuts on a baking sheet and bake in a 350 degree F (180 degree C) oven for 8-10 minutes (walnuts, almonds, or pecans). The nuts are done when they are light golden-brown in color and fragrant. If using hazelnuts, bake them for about 12-15 minutes or until fragrant and the outer skins begin to flake. Remove from oven and cover the hot nuts with a clean dish towel. Let the hazelnuts sit (steam) for about 5 - 10 minutes then rub the nuts in the towel briskly to remove the skins. Let cool completely. Once the nuts have cooled, place them in your food processor and process until finely chopped (or you can finely chop them by hand). 

Makes about 19 - 20 cookies.

Note: This recipe can be doubled.

View comments on this recipe on YouTube

Thumbprint Cookies:

1/2 cup (113 grams) unsalted butter, at room temperature

1/4 cup (50 grams) granulated white sugar

1 large (50 grams) egg, separated

1/2 teaspoon (2 grams) pure vanilla extract

1 cup (130 grams) all purpose flour

1/4 teaspoon (1 gram) salt

3/4 - 1 cup (75 - 100 grams) walnuts toasted and finely chopped (can also use pecans, almonds, or hazelnuts)

1/4 cup (70 grams) raspberry jam (can use other flavors of jam)


Subscribe Now


New Videos


Contact Us   Privacy Policy

Use of materials on all pages on the domains Joyofbaking.com, joyofbaking.mobi, the Joyofbaking.com Facebook Page, @joyofbaking on Twitter, the Joyofbaking.com RSS Feed, the Joyofbaking.com email list the Joyofbaking1 YouTube Channel and any emails sent from @joyofbaking.com are entirely at the risk of the user and their owner, iFood Media LLC will not be responsible for any damages directly or indirectly resulting from the use.

References cited may include a link to purchase the referenced book or item on Amazon.com. Joyofbaking.com receives a commission on any purchases resulting from these links.

This website and the contents are not endorsed or sponsored by the owner of the "Joy of Cooking" series of books or its publisher Simon & Schuster, Inc. and is not related to the  "Joy the Baker" books and website. Video icons by Asher.

Content in any form may not be copied or used without written permission of Stephanie Jaworski, Joyofbaking.com.  Students and non profit educators may use content without permission with proper credit. 

A baking resource on the Internet since 1997

Copyright  1997 to 2023 iFood Media LLC