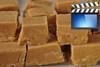
Page loading ... Please wait.
Tested Baking & Dessert Recipes & Videos

breakfast & brunch bars & squares cupcake recipes shortbread recipes comfort foods recipe box
about us
substitutions
ingredients
glossary
conversions
valentine's baking
chocolate recipes
biscotti recipes
candy recipes
cranberry recipes
healthy baking
pudding recipes
quick breads
english tea party
apple recipes
blueberry recipes
lemon recipes
strawberry recipes
pumpkin recipes
trifle recipes
ice cream recipes
halloween baking
thanksgiving baking
christmas cookies
christmas baking
christmas candy
easter baking
baking history
bibliography

Share

Peanut Butter Balls Tested Recipe & Video

Printer Friendly Page

Peanut Butter Balls are a perfect example of how something that tastes really good can also be easy to make. The best way to describe their flavor is to say they are like a homemade Reese's Peanut Butter Cup. They have that same lovely coating of dark chocolate, with a smooth and creamy peanut butter filling that is almost fudge-like in texture.  


Making Peanut Butter Balls couldn't be simpler. The filling ingredients (creamy peanut butter, butter, vanilla extract, and confectioners (powdered or icing) sugar) are just mixed together, rolled into small balls, chilled, and then dipped in melted chocolate. A few notes on making this no bake confection. I have found the best way to make the filling is to first soften the peanut butter and butter in the microwave as this step makes it so much easier to beat in the sugar. However, if you do not have a microwave, you can do this in a heatproof bowl placed over a saucepan of simmering water. Then add the vanilla extract and just enough of the powdered sugar to make a stiff dough (the amount of sugar needed can vary). Then roll the batter into small balls and place them on a baking sheet. Now they do need to be chilled until firm. You can do this by placing the peanut butter balls in the refrigerator for several hours, or even overnight. But a faster way is to just place the peanut butter balls into the freezer and freeze until firm. Freezing the peanut butter balls also makes it easier to dip them in the chocolate. Then, all that is left is to dip the balls into melted chocolate. You can use either good quality semi sweet or bittersweet chocolate. Or you can even use a combination of semi sweet chocolate and milk chocolate. Since the Peanut Butter Balls need to be stored in the refrigerator, adding a little shortening to the melted chocolate keeps the chocolate nice and shiny. The peanut butter balls can be stored in the refrigerator for a couple of weeks, or they can be frozen.

The State of Ohio has their own special name for this confection; "Buckeyes". Buckeyes look slightly different than Peanut Butter Balls in that the top of each bonbon is left bare of chocolate so the peanut butter filling can be seen. This is done to make them look like the nut of the Buckeye tree, which just happens to be the State Tree of Ohio. So popular are "Buckeyes" in Ohio that I read in the Cleveland Dealer that a Ohio State versus Michigan game wouldn't be complete without this candy. A bit of trivia; the name "buckeye" comes from Native American folklore and is said to come from the fact that the Buckeye nut resembles the eye of a buck deer.

Peanut butter is a smooth paste made from roasted peanuts. The peanuts are ground, and then salt, a sweetener, and sometimes a stabilizer (to keep the oil from separating) are added. Peanut butter that is labeled "Old-Fashioned" or "Natural" does not contain a stabilizer which means the peanut butter will separate and you will have to stir the peanut butter before using. You can use either type in this recipe. Also, if you are concerned about trans fat, when buying peanut butter always check the list of ingredients to see if it's listed (labeled as "partially hydrogenated oil" or "hydrogenated oil").

Related Recipes You May Like

Peanut Butter Cups

Chocolate Truffles

Peanut Butter Fudge

Peppermint Patties

Caramel Corn

Peanut Butter Cup Cookies

Peanut Butter Balls: Line two baking sheets with parchment or wax paper.

Place the peanut butter, unsalted butter, and salt in a microwaveable bowl, and heat in the microwave for about one minute or until just soft (check and stir the ingredients every 20-30 seconds). Stir in the vanilla extract and confectioners sugar and mix until it has the consistency of a stiff dough (add more sugar if necessary).

Roll the dough into 1 inch (2.5 cm) round balls. Place on the cookie sheets and refrigerate until firm (several hours or even overnight). You can also place the peanut butter balls in the freezer and freeze until firm (I find this makes it easier to dip them in the melted chocolate).
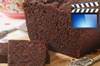
Melt the chocolate and shortening in a heatproof bowl placed over a saucepan of simmering water. Dip the balls, one at a time, in the melted chocolate, making sure the entire ball is coated with chocolate. Then, with two spoons or a dipping fork, remove the peanut butter ball from the melted chocolate, allowing any excess chocolate to drip back into the bowl. Place the chocolate covered balls back on the baking sheet. If desired, sprinkle the balls with finely chopped peanuts. When all the balls have been dipped in the chocolate, place in the refrigerator until the chocolate has set. Store in an airtight container for up to two weeks. They can also be frozen. To serve: place in small fluted candy cups.

Note: If you want to make Buckeyes: place a toothpick into each peanut butter ball and dip, one ball at a time, into the melted chocolate, leaving the top quarter of each ball undipped.

Makes about 60 pieces, depending on size. Preparation time 30 minutes.

References:

Jones, David. Candy Making for Dummies. Wiley Publishing, Inc. New Jersey: 2005.

Peery, Susan Mahnke. The Wellesley Cookie Exchange Cookbook. A Fireside Book. New York: 1986.

Smith, Andrew F. The Oxford Companion to American Food and Drink. Oxford University Press. New York: 2007.

Peanut Butter Balls

2 cups (480 ml) creamy peanut butter

1/4 cup (57 grams) unsalted butter, room temperature

1/4 teaspoon salt (optional)

1/2 teaspoon pure vanilla extract

2 - 2 1/2 cups (230 - 300 grams) confectioners (powdered or icing) sugar

Chocolate Coating

9 ounces (260 grams) semi sweet chocolate, coarsely chopped

1 tablespoon (15 grams) shortening

 
Share


Join Our New  Recipes & Videos Email List

New Videos


Top 40 Recipes of 2011

1. Red Velvet Cake

2. Vanilla Cupcakes

3. Chocolate Chip Cookies

4. Royal Icing

5. New York Cheesecake

6. Peanut Butter Balls

7. Chocolate Cupcakes

8. Carrot Cake

9. Sugar Cookies

10. Shortbread Cookies

11. Whipped Cream Frosting

12. Red Velvet Cupcakes

13. Ganache 14. Oatmeal Cookies 15. Pound Cake
16. Coconut Macaroons 17. Chocolate Truffles 18. Fruit Tart 19. Pavlova 20. Gingerbread Men
21. Banana Bread 22. Snickerdoodles 23. Apple Pie 24. Meringue Cookies 25. Yellow Butter Cake
26. Apple Crisp 27. Lemon Curd 28. Nanaimo Bars 29. Molten Chocolate Cakes 30. Cream Scones
31. Brownies 32. Rum Balls 33. Biscuits 34. Pumpkin Pie 35. Lemon Bars
36. Mexican Wedding Cakes 37. Melting Moments 38. Boston Cream Pie 39. Chocolate Crinkles 40. Butter Tarts


Contact Us   Privacy Policy Follow Joyofbaking On Twitter Stephanie Jaworski+

Use of materials on all pages on the domains Joyofbaking.com, joyofbaking.mobi, the Joyofbaking.com Facebook Page, @joyofbaking on Twitter, the Joyofbaking.com RSS Feed, the Joyofbaking.com email list the Joyofbaking1 YouTube Channel and any emails sent from @joyofbaking.com are entirely at the risk of the user and their owner, iFood Media LLC will not be responsible for any damages directly or indirectly resulting from the use.

This website and the contents are not endorsed or sponsored by the owner of the "Joy of Cooking" series of books or its publisher Simon & Schuster, Inc. Video icons by Asher.

Content in any form may not be copied or used without written permission of Stephanie Jaworski, Joyofbaking.com.  Students and non profit educators may use content without permission with proper credit. 

A baking resource on the Internet since 1997

Copyright  1997 to 2012 iFood Media LLC