Page loading ... Please wait.
Baking & Dessert Recipes & Pictures

breakfast & brunch bars & squares biscotti recipes shortbread recipes comfort foods healthy baking
about us
substitutions
ingredients
glossary
conversions
valentine's baking
english tea party
quick breads
chocolate recipes
pumpkin recipes
apple recipes
cranberry recipes
blueberry recipes
lemon recipes
strawberry recipes
trifle recipes
ice cream recipes
pudding recipes
easter baking
christmas baking
christmas cookies
christmas candy
halloween baking
thanksgiving baking
baking history
bibliography

Kim Komando, America's Digital Goddess

Ice Cream Cones Recipe

Printer Friendly Page

Ice Cream Cones Recipe

History tells us that the ice cream cone made its debut at the 1904 St. Louis World's Fair. But history also tells us there are many conflicting stories on who invented it. Officially, though, Paul Dickson in his "The Great American Ice Cream Book" tells us that the International Association of Ice Cream Manufacturers (IAICM) has given Ernest A. Hamwi the credit for inventing the cone. 

The story begins at the turn of the last century when ice cream was very popular. Due to its popularity   there were over 50 ice cream vendors selling a total of 5000 gallons of ice cream per day at the 1904 St. Louis World's Fair. Ernest Hamwi was one of the vendors at the fair but he was not selling ice cream, he was selling a type of waffle (zalabia). The story goes that one day, a man (named Arnold Fornachou) at the next booth ran out of small dishes to serve his ice cream. Hamwi got the idea to roll one of his hot Belgian waffles into a cornucopia and told Fornachou to put a scoop of his ice cream into the cornucopia's mouth. They were an instant hit with Fornachou's customers and they lined up to have their ice cream served this new way. From there, because the cones were so popular at the Fair, the St. Louis foundries started manufacturing molds for making the cornucopia shaped cones. The cones were first given the name "World's Fair Cornucopia" until about 1909 when they were renamed "ice cream cones". The cone gained popularity across the United States because by 1924 Americans were consuming upwards of 245 million cones per year. 

This recipe makes a crepe-like batter that produces a cone that is a cross between a sugar cone and a crepe. You can cook the batter on a griddle or in a 8-9 inch (20-23 cm) nonstick saute pan over medium-low heat. Once the batter is cooked until golden brown on both sides it is removed from the heat and quickly rolled (while still hot) into the shape of a cone. Squeeze the end of the cone to seal it so the ice cream doesn't drip out and then place the cone on a wire rack to cool. The cones are best eaten within a few hours of making them. However, if you have leftovers they can be reheated and re-rolled again the next day with excellent results. Making these cones does take a little practice, both in cooking the batter and rolling them into a cone shape. But you will find it definitely worth the effort and it will be hard to ever eat the store bought cones again.


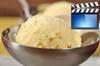
Ice Cream Cones: In a medium sized bowl whisk together (or use a hand mixer) the eggs and sugar until frothy. Whisk in the melted butter, milk and vanilla extract. Add the flour and salt and whisk until the batter is smooth. The batter should be quite thin (like a crepe batter) so add more milk if the consistency is too thick. 

Heat a 8-9 inch (20-23 cm) saut?pan over medium heat until it is hot. Reduce the heat to medium low and brush the pan lightly with vegetable oil. Pour or ladle about 3-4 tablespoons of batter into the pan and  immediately tilt or rotate the pan so the batter forms a thin 5-6 inch (13-15 cm) circle. Place pan back on the heat and cook until the batter is set and you can see the underside is golden brown (3-4 minutes). Slip a metal spatula under the crepe and gently flip it over. Cook until golden brown. Remove the pan from the heat and slide the crepe from the pan onto your work surface. While the crepe is still hot, quickly start at one edge and roll the crepe into a cone shape. Squeeze the tip of the cone to seal it so the ice cream won't drip out. Place on a wire rack to cool completely. 

Continue making the rest of the cones, lightly brushing the pan with vegetable oil each time. These cones are best if eaten the same day.

However, if you have leftovers store them in a covered container. To re-crisp the cones preheat the oven to 400 degrees F (205 degrees C). Working with one cone at a time, unroll the cone until it is a circle again, place  on a baking sheet and bake for about 3-5 minutes or until the crepe is hot and soft. Remove from oven and place the hot crepe on your work surface. Quickly reroll into a cone shape, again squeezing the tip of the cone so the ice cream won't drip out. Place on a wire rack to cool.  Continue with the rest of the cones.

Makes about 8 ice cream cones.

Ice Cream Cones Recipe:

2 large eggs

1/2 cup (100 grams) granulated white sugar

4 tablespoons (57 grams) unsalted butter, melted and cooled

2 - 3 tablespoons milk

1/2 teaspoon pure vanilla extract

1/3 cup (50 grams) all purpose flour

1/8 teaspoon salt

Vegetable oil and pastry brush


Sources

Dickson, Paul. The Great American Ice Cream Book. New York: Galahad Books, 1972.

Marian, John F. The Dictionary of American Food & Drink, New Haven and New York: Ticknor & Fields, 1983.

Pence, Caprial and Carey, Melissa. Caprial's Desserts. Berkeley: Ten Speed Press, 2001.

Ramsay, Gordon. Just Desserts. San Diego: Laurel Glen Publishing, 2001.

Root, Waverley & de Rochemont, Richard. Eating in America A History. New York: William Morrow and Company, Inc. 1976.


Bookmark and Share

Join Our New & Featured Recipes Email List

New Recipes


Top 40 Recipes of 2009*

*Top 40 Recipes based on actual site traffic from January 1, 2009  to December 30, 2009.

1. Chocolate Chip Cookies

2. Red Velvet Cake

3. Shortbread Cookies

4. Royal Icing

5. New York Cheesecake

6. Carrot Cake

7. Sugar Cookies

8. Vanilla Cupcakes

 9. Banana Bread

10. Chocolate Truffles

11. Pound Cake

12. Ganache

13. Apple Crisp 14. Oatmeal Cookies 15. Pumpkin Pie
16. Apple Pie 17. Gingerbread Men 18. Pavlova 19. Coconut Macaroons 20. Biscuits
21. Cream Scones 22. Lemon Bars 23. Rum Balls 24. Snickerdoodles 25. Whipped Cream Frosting
26. Yellow Butter Cake 27. Pumpkin Cheesecake 28. Fruit Tart 29. Lemon Curd 30. Butter Tarts
31. Chocolate Crinkles 32. Thumbprint Cookies 33. Melting Moments 34. Boston Cream Pie 35. Chocolate Cupcakes
36. Nanaimo Bars 37. Mexican Wedding Cakes 38. Molten Chocolate Cakes 39. Almond Biscotti 40. Peanut Blossom Cookies
Joyofbaking.com on Facebook


Contact Us   Privacy Policy Follow Joyofbaking On Twitter

Arabic Mandarin Dutch French German Hindi Indonesian Italian Japanese Korean Norwegian Portuguese Russian Spanish Greek Swedish Finnish

Use of materials on Joyofbaking.com is entirely at the risk of the user and Joyofbaking.com, Stephanie Jaworski or Rick Jaworski will not be responsible for any damages directly or indirectly resulting from the use.

This website and the contents are not endorsed or sponsored by the owner of the "Joy of Cooking" series of books or its publisher Simon & Schuster, Inc.

Content in any form may not be copied or used without written permission of Stephanie Jaworski, Joyofbaking.com.  Students and non profit educators may use content without permission with proper credit. 

A baking resource on the Internet since 1997

Copyright  1997 to 2010 Stephanie & Rick Jaworski