|
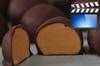
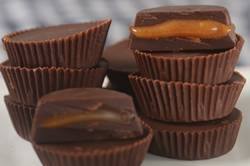
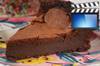
Chocolate Caramel Cups:
Line 24 miniature muffin cups with foil or paper liners.
In a small
saucepan (or in the microwave) heat the cream and salt just until boiling.
Remove from heat and cover to keep it warm while you caramelize the sugar.
Heat a heavy
bottomed saucepan over medium high heat until very hot (but not smoking).
Sprinkle the bottom of the pan with a thin layer of sugar. Adjust the heat, if
needed, and allow all the sugar to melt until it becomes translucent, swirling
the pan as needed so it melts slowly and evenly. (Watch carefully so it doesn't
burn.) You can use a silicone spatula or wooden spoon to gently stir the caramel
once it has mostly become liquid. Continue to add the remaining sugar in three
to four stages, swirling the pan, and stirring as needed so the sugar melts
evenly. Once all the sugar has been added and has melted, continue to cook the
sugar until it has become a deep reddish brown color, stirring frequently.
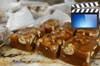
Then remove from
heat and, stirring vigorously, add about a quarter of the hot cream. Be careful
because when you first add the cream the caramel will steam and sputter.
Continue to slowly add the rest of the cream, while stirring constantly. If the
caramel is not smooth, place over low heat and cook, stirring constantly, until
any lumps have melted. Finally, stir in the butter and vanilla. Let cool until
slightly thickened before using to make the Chocolate Caramel Cups. The caramel
can be covered and stored at room temperature for a week to ten days. It will be quite
thick, so reheat if necessary.
Chocolate: Melt the
chocolates and shortening in a heatproof bowl, placed over a saucepan of simmering
water.
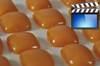
Spoon, or pipe,
about one teaspoon of
the melted chocolate into each of the paper cups. Tap the
pan gently on the counter to smooth out the chocolate. Then place the pan in the
refrigerator for about 10 minutes or until the chocolate has set. Remove from
refrigerator and spoon (or pipe) about one teaspoon of
the caramel on top of the chocolate. Then top with another
teaspoon of melted chocolate. Tap the pan gently on the counter to smooth out
the Chocolate Caramel Cups. If necessary, add a little more chocolate to get a
smooth top. Refrigerate about 20 minutes or until set. Store in an airtight
container in the refrigerator for about a week, or they can be frozen.
Makes about 24
Chocolate Caramel Cups. Preparation time: 60 minutes.
View comments on this recipe on YouTube
|


